Use-Case #2 - Area Monitoring and Investigation
This document aims to provide a brief description of a specific workflow within Windward’s platform.
Keep in mind that a full integration process will enable your organization to build custom workflows and implement a wide range of use-cases tailored to individual needs of different stakeholders (analysts, operators, IT, developers etc.).
To learn more about backend integration flow, [follow this link]
Meet Lucy, an analyst working for a leading research institution, looking to explore risk factors associated with a specific vessel detected in a live UAV mission. Lucy would like to quickly define her area of interest (polygon), explore existing vessels in the area, cross reference the vessel id and review its timeline for more information.
This workflow combines webapp and API calls to set up the reference area and to define the query parameters by which vessels of interest are selected.
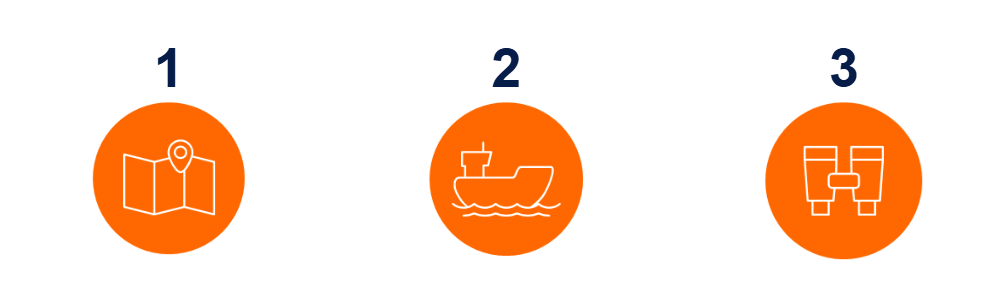
| Define area of interest | Get risky vessels by polygon | Explore vessel activity |
|---|---|---|
| use Areas API or webapp polygon | VesselsInArea or RiskyVesselsInArea | erence/vesseltimeline#/ |
Starting with the initial authentication, steps 1-12 are covering the creation of a valid token in the platform which will be used to run the queries. If you are already familiar with these steps skip ahead to step #13.
- Login to the company’s Windward account (GraphQL environment) - user and password to your project (link)
- Once in GraphQL, select “explorer” from the left-side menu
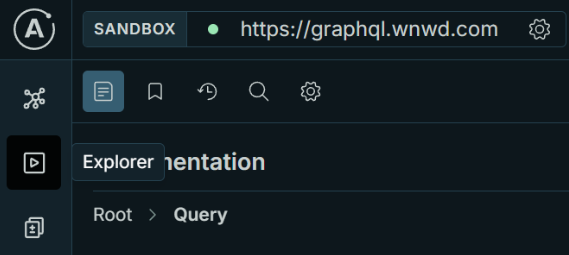
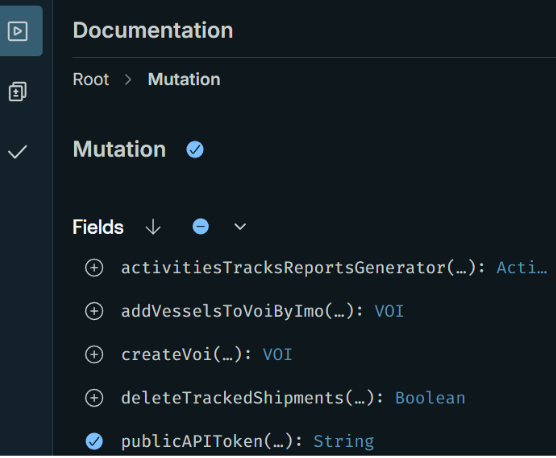
- Navigate to Root > Mutation
- Select the publicAPIToken
-
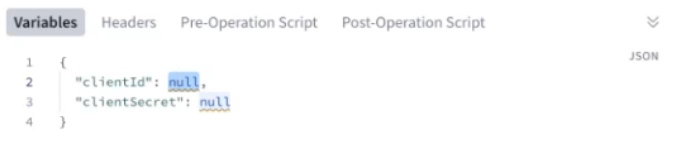
The top section of the screen will show the relevant operation being performed, while the lower section “Variables” tab will indicate which parameters are being injected to this request. The two fields listed are “clientId” and “clientSecret” (which will be provided in advance by our support team).
-
Paste the values for the two above mentioned fields, replacing the default “null” value.
-
Run the mutation using the Play button at the top of the main section [ ▶ Mutation ]
-
On the right section, a response will be presented according to the parameters provided. Copy the value of the “publicAPIToken” marked in blue (ignoring the quotation marks at the beginning and end of the string).
You may also switch to table view instead of the raw JSON to easily copy the token value.
Note that this Token is valid for 15 minutes only, so if needed, repeat the step #7 above to generate a new Token. It is advised to keep the “Mutation” tab open at this point in case you need to run it again. Click the “+” icon to the right of the tab to open a “New Workspace” for your next query.
| 💡Once the integration process is completed, there will be no need to manually refresh the Token. This authentication process should be designed as a dedicated method to meet industry best practices. |
|---|
- In this new workspace, select the lower tab for “headers”, then click “+ New header” on the lowest section. Two fields will appear in order to define the header structure.
- On the left field select “authorization” from the drop-list.
- On the right field enter “Bearer “ and paste the Token copied in step #8. (make sure there is a single space char between these two strings).
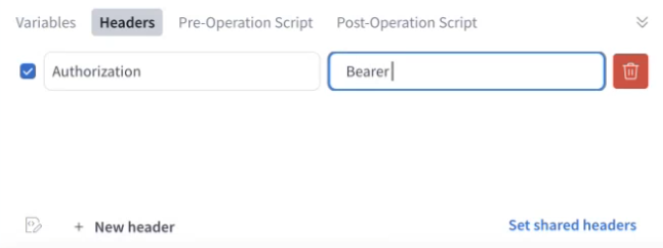
- Switch back from “Headers” tab to “Variables” tab.
Execute queries
Define area of interest
There are a few options to define a specific geographical area / polygon.
- Use Areas API to select polygon id for areas pre-defined in Windward’s platform.
- Use your own polygon details (coordinates and label) - this option will allow you to get webhook notifications for future events detected in this area, but it will require further processing by Windward which is done once a week. After completion, you will be able to use your named area for all future queries.
- Option 1 - webapp explorer: Open the webapp side menu and select the “layers” tab. You can choose any of the defined “system area” types, for example “ports” and their adjacent area (a.k.a “port waiting area”).
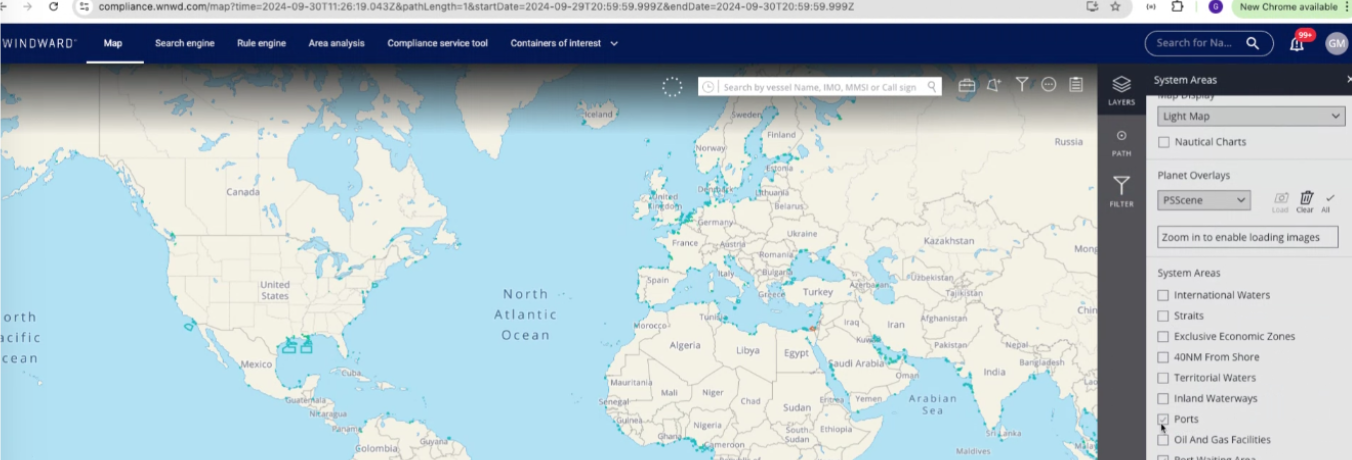
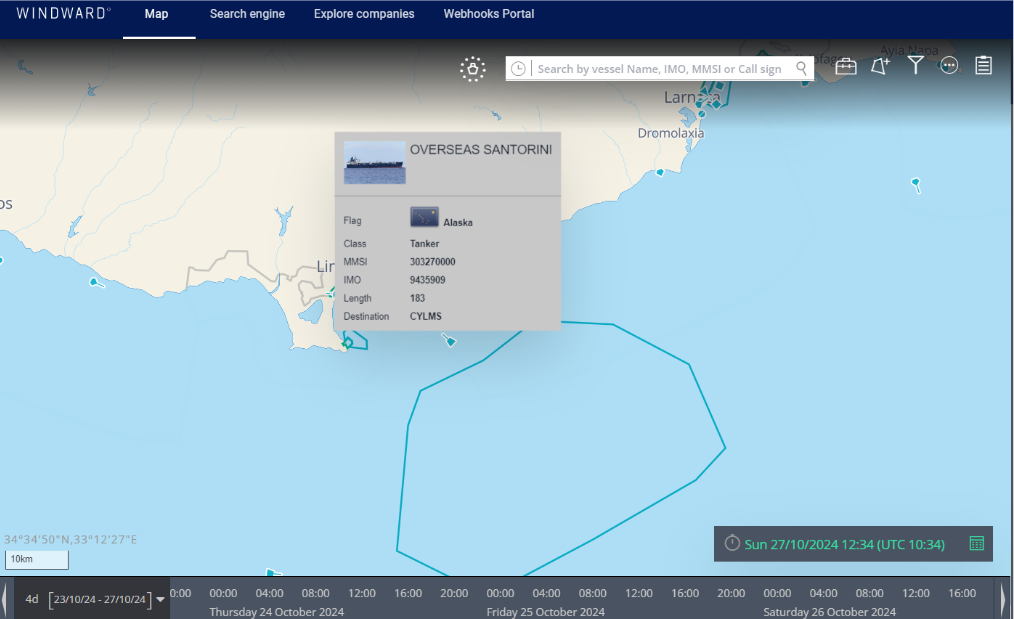
- Zoom in to locate relevant vessels within the area of interest. Hover on a specific vessel to load a preview with its basic information.
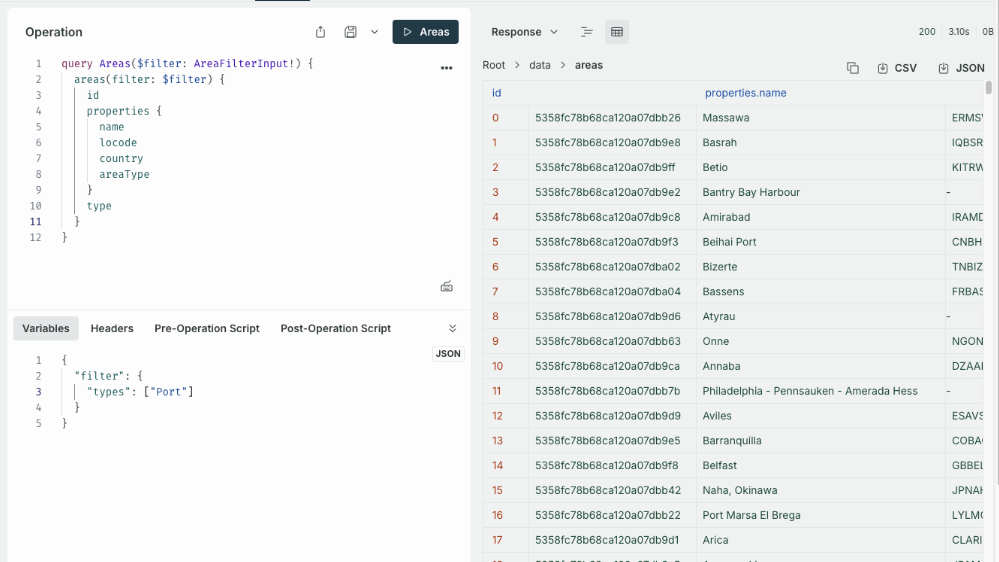
- Option 2 - VesselsInArea API
- Explore the link to the online documentation to easily adjust your query by copy & paste.
- Edit the query structure to include the relevant fields you wish to get in the response payload.
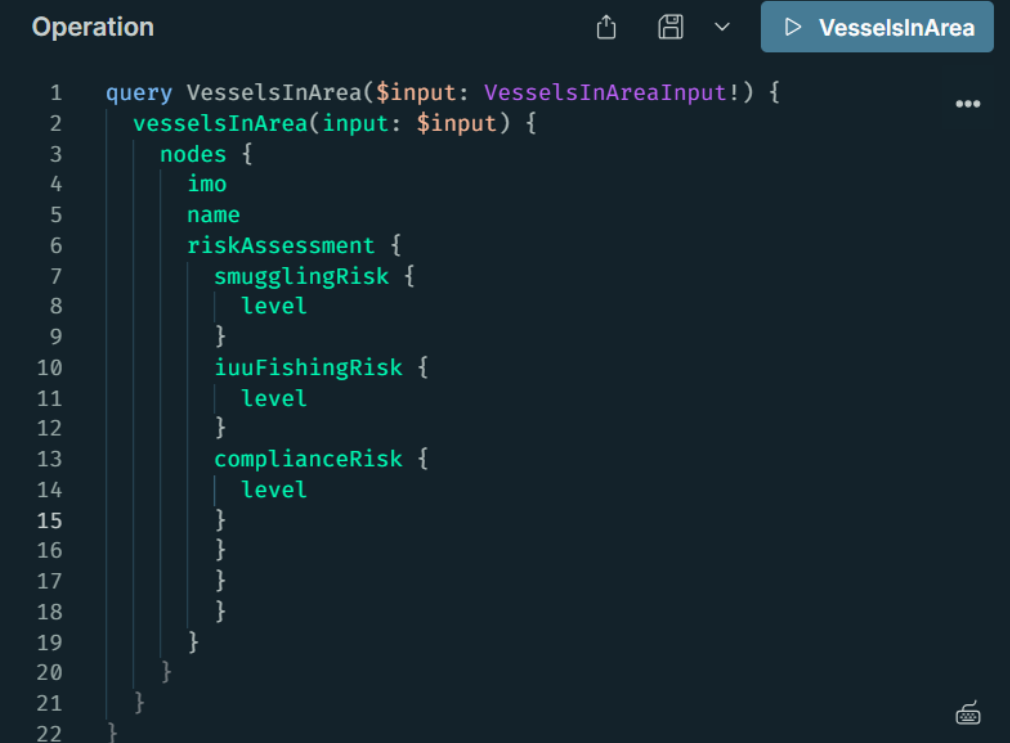
- Edit the polygon coordinates and time ranges (according to the provided syntax)
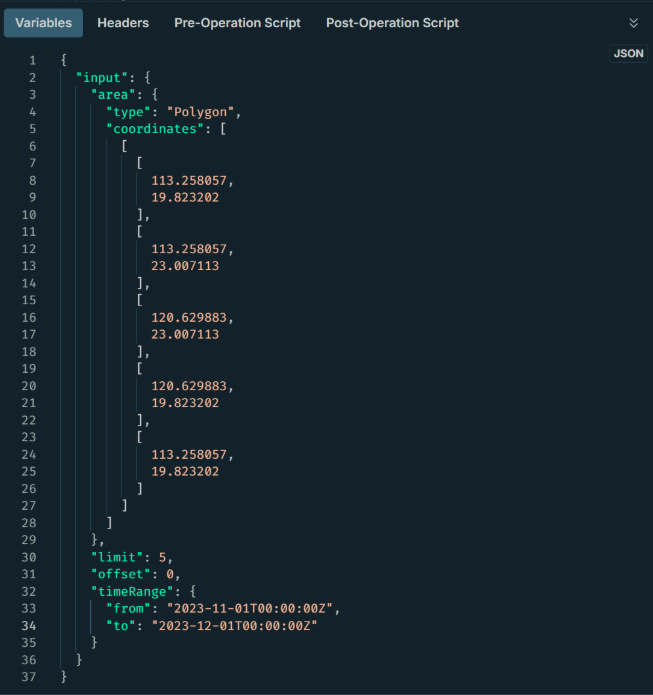
- Execute the query by pressing the “play” button on the top [ ▶ VesselsInArea ]
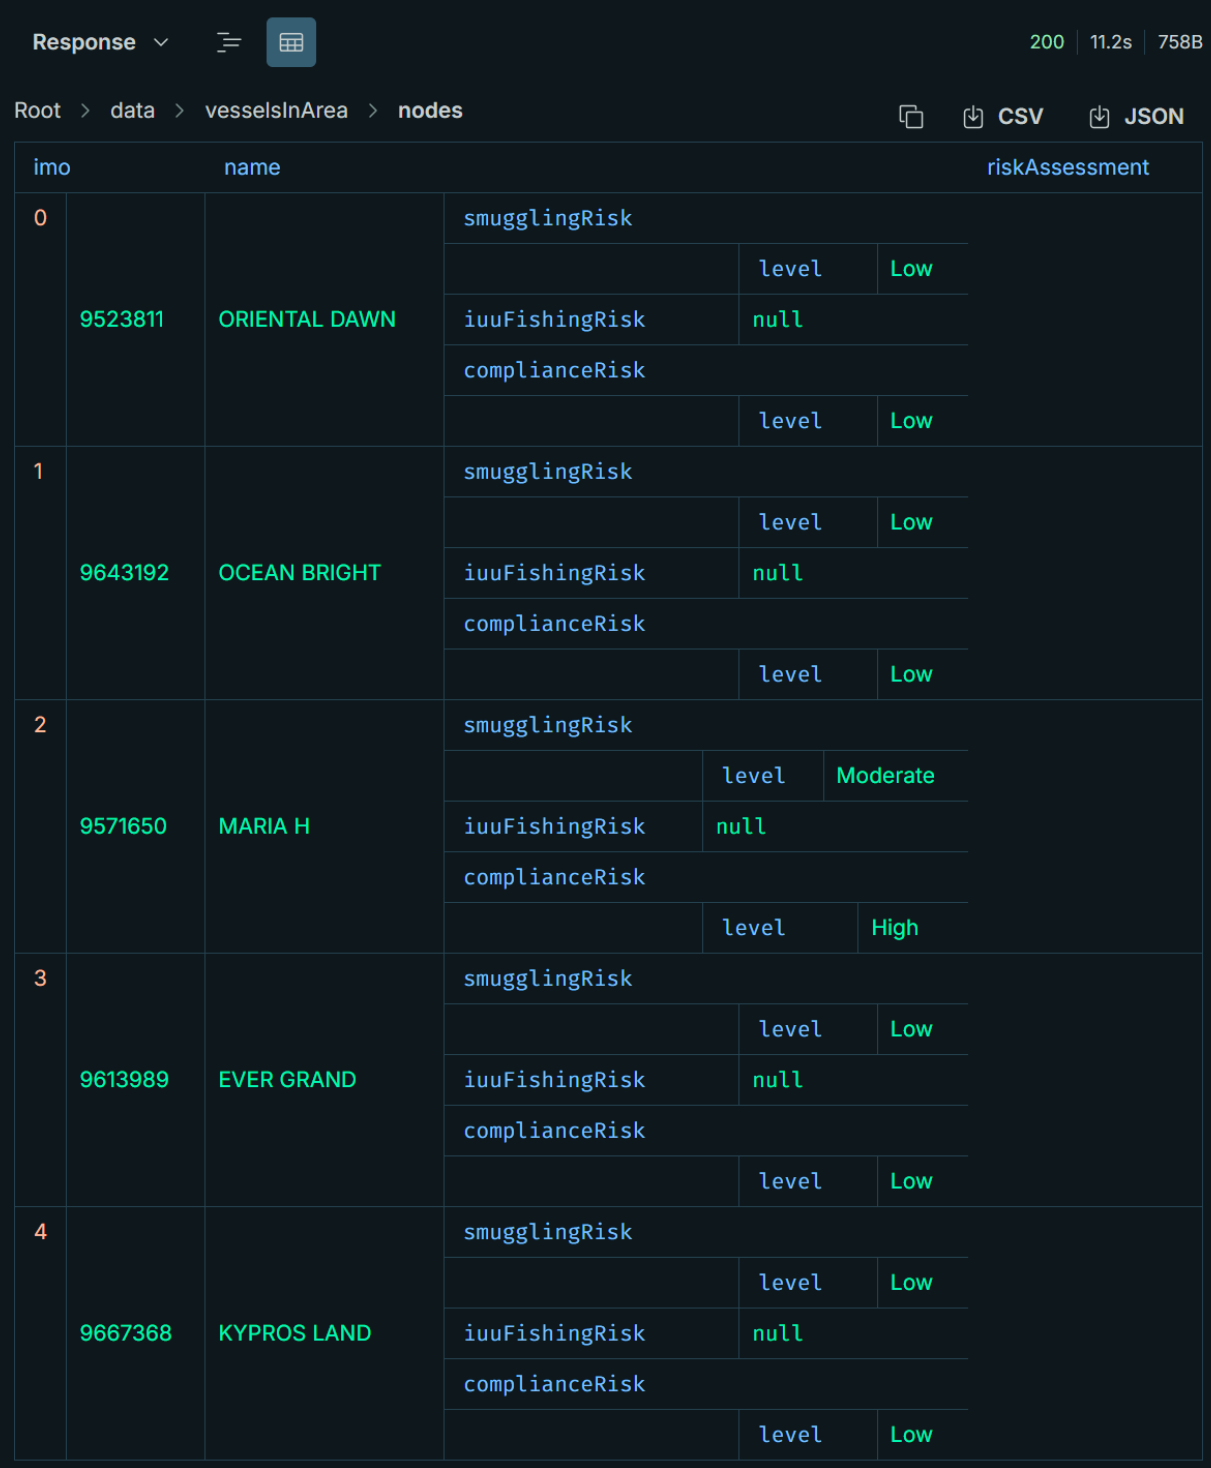
- Response payload can be presented as JSON or data table. You can also download the payload as CSV or JSON for offline processing.

Investigate vessels
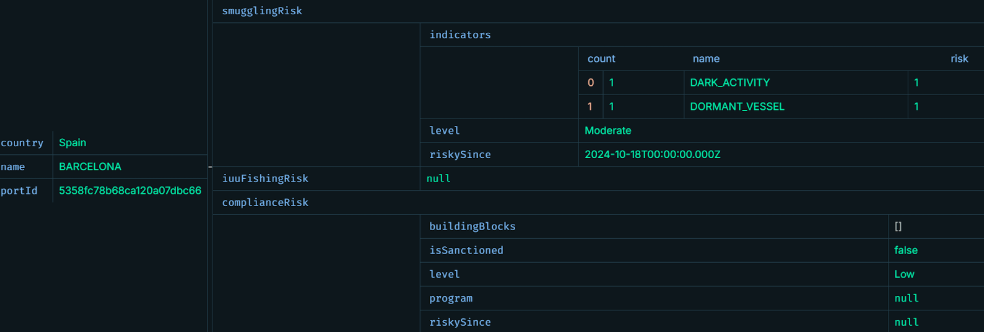
To efficiently allocate your investigative resources, you may utilize Windward’s risk assessment data (provided in previous step) and concentrate your efforts on vessels deemed high or moderate risk.
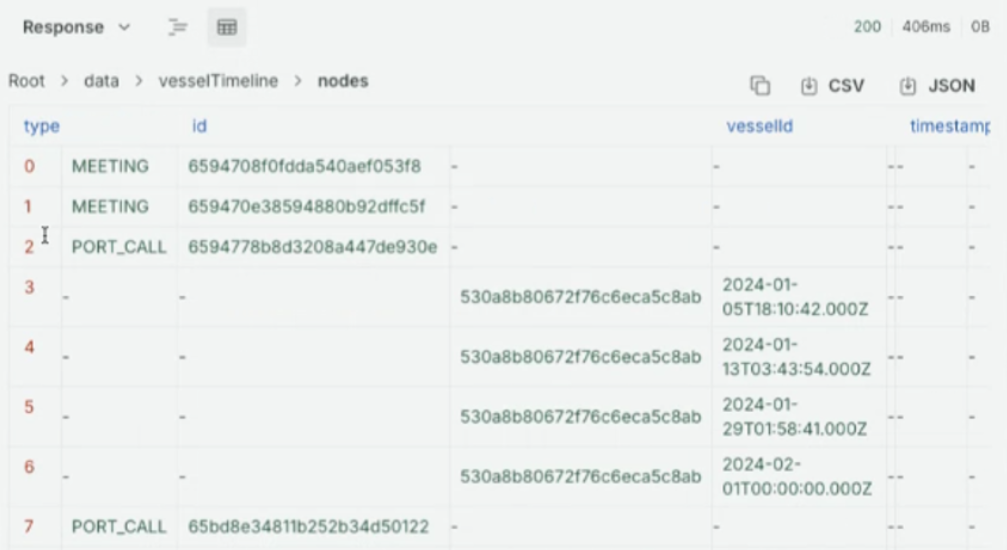
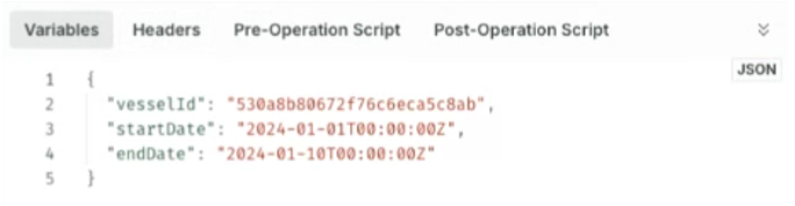
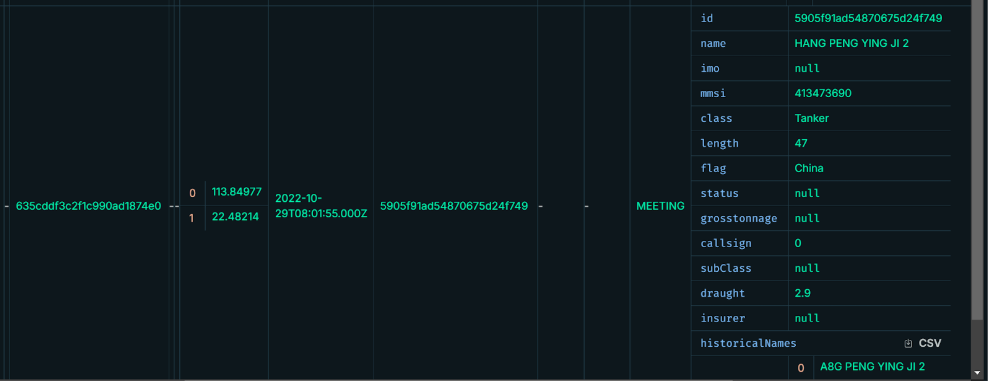
- Copy any of the vessels’ id/IMO to further explore relevant information. This can be achieved by using the VesselTimeline API (see samples for both query and variables to edit according to your preferences).
- Define the list of suspicious activity types, such as: "MEETING" "STANDING" "BAD_WEATHER"
- Get a temporary URL showing a detailed webpage including vessel timeline. Use the ReadOnlyVesselProfileLink API and provide the vessel id and timeframe.
- Execute the query [ ▶ ReadOnlyVesselProfileLink ]
- Copy the link provided in the payload. This will allow public access to anyone using it within the following 72 hours.

Alternative Method
Similar investigation methods can be implemented using the following:
- riskyVesselsInArea API, showing which vessels are flagged by WIndward with any risk score related to IUU fishing, sanctions compliance, or border security risks in the selected area.
- activitiesInPolygonAPI, which can be used to detect specific activities in an area/timeframe, without having to specify a vessel id/IMO. (see activity types for more details)
Setting Up Custom Polygon
Windward platform has a wide set of predefined polygons for different types of research. Each polygon is identified with a unique id string and tagged according to its context (for example “port waiting area”). Windward’s deployment teams can assist with locating the relevant areas for you.
The platform also makes it easier for you to find relevant area definitions using the “Areas” endpoint documentation and samples, including an explanations regarding the different area types.
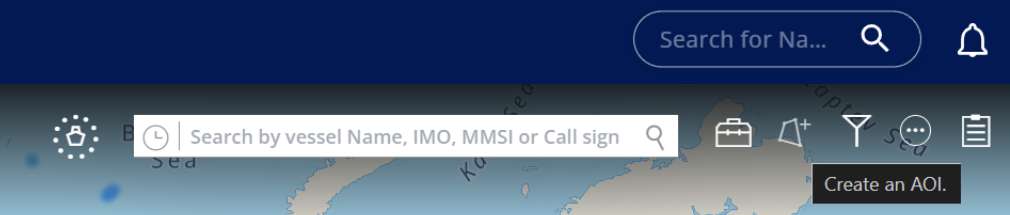
A custom polygon can be created using the webapp quick access icons on the top-right side of the map - “Create an AOI” (Area of Interest).
Once clicked, provide a label to the new polygon and choose a color for it.

Start clicking on the map to create a set of coordinates which will define the border of the required area. Note that the maximum allowed area is 1,000,000 NM².
When all pins are dropped, click on the 1st pin again in order to finish the polygon. Once clicked, the popup will show the total measurement, total area and the number of vessels currently detected within the polygon.
Click the “Save” button to complete the action.
Search and webhook triggering
Once a custom area is defined, Windward platform will be able to perform calculations and monitoring within it in order to trigger webhooks. This process will take up to a week when a new polygon is created for the first time.
Define the search parameter within the polygon in order to trigger webhook notification for new activities in your newly created area of interest.
SupportFor further assistance, contact your Solution Architect POC or refer to the API documentation at https://developer.windward.ai/
.